One of the most common questions we get asked by event providers is how to get video assets from speakers.
This doesn’t have to be a logistical nightmare.
Video rocks, and it rocks even more when you have time to edit it professionally, so the last thing you need is to chase people until the last minute.
Here are my tips to make the experience more seamless:
- Record the video on a live onboarding call
By far the easiest way is to get it done during a live a Zoom call with the speaker. The quality is not the best, but it may be acceptable and you can drive the conversation by asking a sequence of questions and getting them to talk. You can also ask for supporting material (slides & other media assets).
Pros: This is less work for you and your speaker on the front end and feels more natural to them. Works best for ‘summary type’ videos.
Cons: It could increase the complexity of editing, but you can use a live transcription service to help specify the cuts for your video editor. - Record the video on a small broadcast
This is best for TED-style talks where the speaker needs to feel energized by a live audience to perform at their best. You can bring some of your team onto the call to simulate this. Start with a brief conversation to ‘socially activate’ the speaker and get them ready to record their talk. They will appreciate this and will feel the difference.
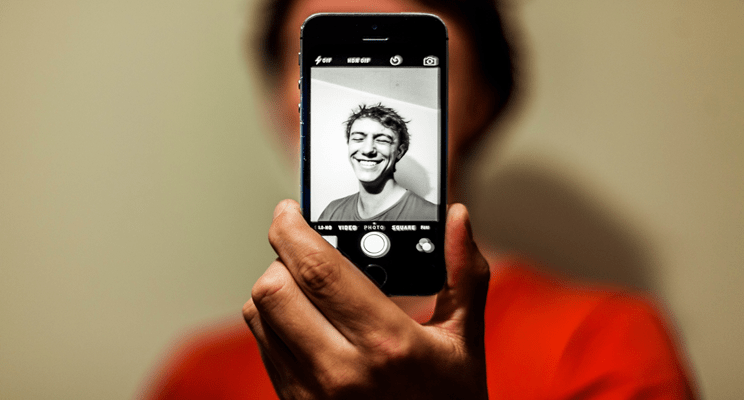
- Ask them to record it on their mobile phone (front camera)
Most people don’t own a high-quality standalone camera, but they carry one with them at all times!
Pros: The video and audio quality of the average mobile device is far superior to the average laptop, and the result can be astonishing, even just using natural light. Works best for ‘intro type’ videos.Cons: The front camera will record the best quality video, so, ideally this setup needs someone to play camera man (or careful positioning with a tripod). Audio from further away will be a challenge, unless a second device is placed closer to the user. (Audio quality is best using the native microphone and not an extension mic or lavalier).
- Recording using the rear camera
An alternative to method #3 for quick results! If the speaker is pressed for time and they want to record the video selfie-style, then in most modern mobile phones this is still OK. They can place the camera in front of them and will be able to see how they are framed, which is easier. Bonus: They can download and use a teleprompter app, so they can read their script and not have to memorize a thing!
- Studio or at-home production
If budget is ample, you can also hire a professional photographer to record your speaker in the studio or at home, with the right lights, sound, etc. You can even organize a little social for your speakers, so you can knock it all out at the same time and maximize studio time.
Conclusion:
People expect high quality online, so a simple screenshare with powerpoint (yawn) isn’t going to cut it. Especially without the speaker’s face showing!
In my next post I’m going to share some tips on optimizing video production and keeping it lean.